ECLAIR Manager
BUGSENG ECLAIR is a certified static analysis tool for software verification, focused on MISRA, BARR-C and AUTOSAR C compliance, software metrics, and the automatic detection of critical software errors.
Zephyr has a built-in integration with ECLAIR. This panel allows you to easily run ECLAIR analyses and browse reports on your Zephyr applications, directly from the Zephyr Workbench.
To open the ECLAIR Manager, select Analysis > Static Code Analysis > ECLAIR Manager or use the ECLAIR Manager command in the Command Palette.

Overview
You will be presented with the ECLAIR Manager view, showing:
- ECLAIR status: status and management
- Context selection: project and build configuration
- Configuration selection
- Analysis section: containing a button to start the analysis
- Report viewer section: that allows to start the ECLAIR report viewer
To get started, you will have to:
- configure the path to the ECLAIR
bindirectory so that it is correctly detected by the extension - select the context (project and build configuration) to analyze
- create a configuration for the analysis, or select an existing one
- run the analysis and view the reports in the browser
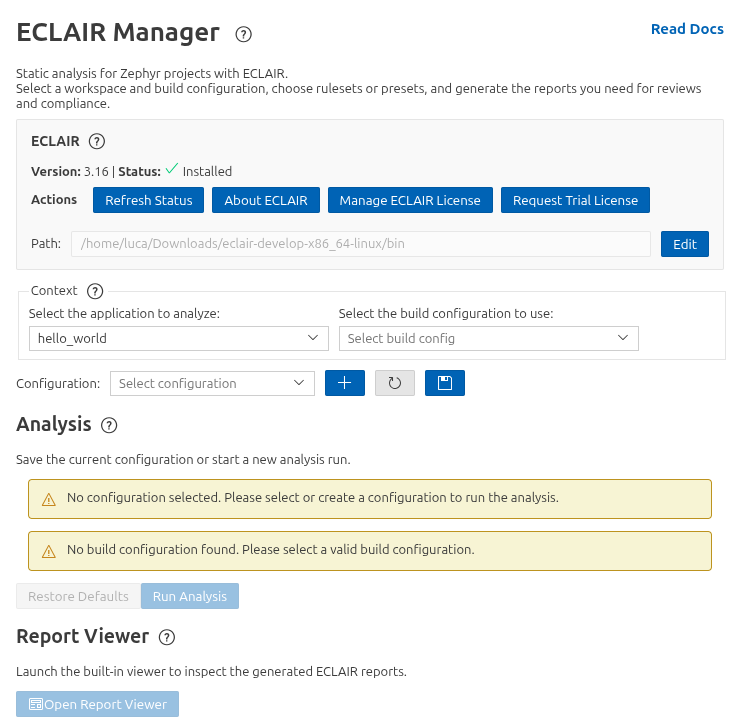
ECLAIR installation and detection
The ECLAIR Manager detects ECLAIR by checking the Zephyr Workbench environment settings first, then the system PATH.
If ECLAIR is not detected automatically, set the install path to the directory that contains the ECLAIR binaries (the bin directory of the ECLAIR installation).
Creating a configuration
Once you have selected the application and the build configuration to use, you will be able to create a configuration for the analysis using the + button.

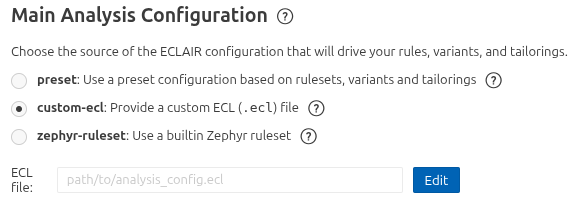
After creating the configuration, you can select the kind of configuration you want to use.
There are currently three kinds of configuration available:
- preset: choosing from a variety of presets from repositories or local files
- custom-ecl: using a custom ECL file
- zephyr-ruleset: using ruleset provided by the ECLAIR integration in the Zephyr project
The configurations can be saved with the "Save" button. They will be stored in the .vscode/zephyr-workbench.eclair.json file of each workspace. You can safely track this file in your version control system.

Using presets
Presets are special ECLAIR Configuration Files (.ecl) with additional metadata that allows them to be displayed in a user-friendly way in the extension and expose additional configuration options.
Presets can either be provided by a repository or be local files.
Preset repositories
Preset repositories are normal git repositories that contain special .ecl files, which are recognized and shown in the UI.
The reference repository for presets is the one provided by BUGSENG1, which is available by default and contains, along with a variety of curated presets, the specification of the preset format.
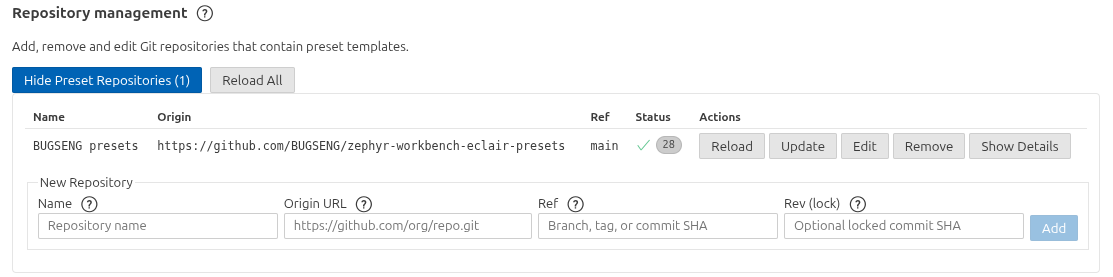
You can create or fork a preset repository to add your own presets so that they can easily be reused across projects or your organization by providing:
- a name to identify the repository in the UI
- the URL of the repository
- the branch or tag to use
- (optionally) the hash of the commit to use, to accurately pinpoint the version of the presets to use
For each repository, several actions are available. In particular the "Update" button will fetch the latest version of the repository at the specified branch/tag, updating the hash of the commit.
🛈 The hash will be stored alongside the configuration in the
.vscode/zephyr-workbench.eclair.jsonfile, so that you can easily track any updates to the pinned version.
Selecting a preset
The ECLAIR Manager classifies presets in three categories:
- ruleset: presets that provide the list of rules to apply for the analysis
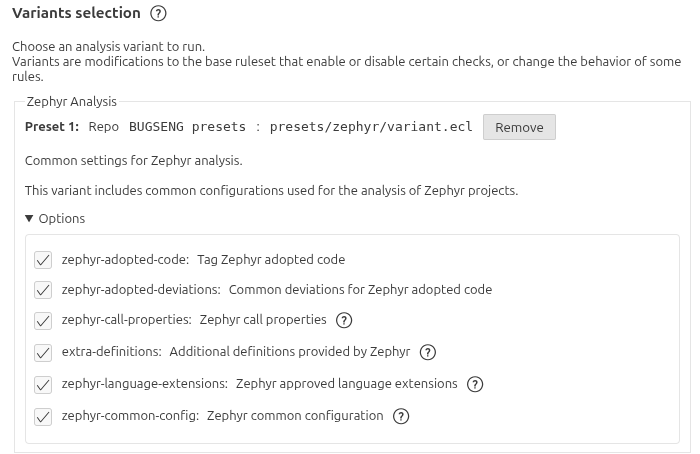
- variant: providing configuration options for the analysis
- tailoring: providing additional configuration options for the analysis to fine-tune the results based on the context of the project
For each kind of preset you will be able to select one or more presets to apply for the analysis from the available presets in the repositories, or by choosing a local file.
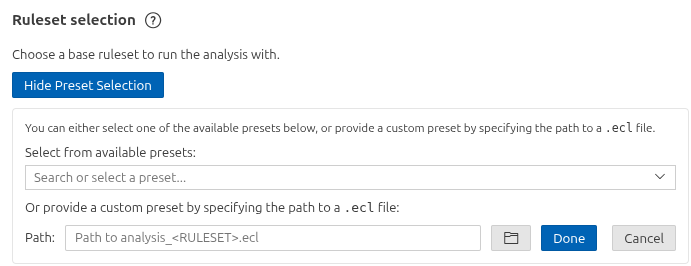
If the preset exposes configuration options, they will appear in the UI and you will be able to set them before running the analysis.
Using custom ECL files
If you already have ECLAIR Configuration Files (.ecl) that you want to use, you can select the "custom-ecl" configuration kind and choose the file to use for the analysis.
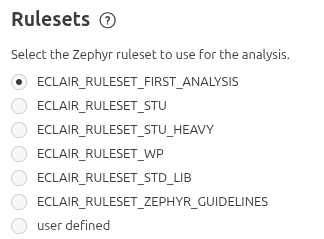
Using a Zephyr ruleset
The Zephyr project contains several in-tree ECLAIR rulesets that can be used for the analysis as described in the Zephyr documentation.
The ECLAIR Manager allows you to easily select one of these rulesets:
Additional configuration .ecl file
Independently of the kind of configuration you choose, you can also select an additional ECL file to fine-tune the configuration for the analysis. This file is merged with the main configuration selected, allowing you to customize the analysis without having to create a new preset.

Selecting reports
The Reports section lets you choose which outputs to generate after analysis completes. You can enable all report formats with ALL, or pick a subset such as:
- summary and full reports in TXT, DOC, ODT, or HTML
- metrics and SARIF outputs
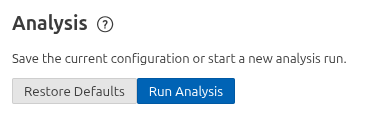
Running the analysis
Once the configuration is ready, you can start the analysis by clicking the "Run Analysis" button in the "Analysis" section.
This will open a terminal and run the ECLAIR analysis with the selected configuration:

The analysis log is displayed in the terminal. For more information on running ECLAIR, see the Zephyr documentation.
Browsing the reports
Once the analysis is complete, you can use the "Open Report Viewer" button. This will start the ECLAIR report server (eclair_report) and open the browser to display the report viewer, allowing you to easily browse the results of the analysis.
If you've also installed the ECLAIR extension which is provided alongside with the ECLAIR installation, Ctrl + click on a report area will show the location on an editor panel inside your VS Code session.